

Interested in getting started with your new Raspberry Pi, but don’t have an extra keyboard and monitor to set it up with? Or just looking to create a project that doesn’t involve the full desktop build?
This guide will show you how to get setup on the Raspberry Pi without needing any extra hardware. Simply create the SD card image, power the device, and connect to it over WiFi.
I’ll be walking through the setup with a Raspberry Pi Zero 2W, but these steps apply to any model Raspberry Pi. If you prefer to watch, I’ve created video instructions below.
Setting Up a Raspberry Pi ‘Headless’
The term ‘Headless’ refers to a computer that runs without a monitor, keyboard, or mouse. For small projects meant to run indefinitely, or devices like the RPi Zero 2W with no standard USB ports, setting up a project headless can be both practical and economical.
Using SSH
Connecting using SSH (Secure Shell) is the fastest and simplest method for getting a Raspberry Pi project up and running. It involves no additional hardware and the least amount of Linux configuration.
SSH relies on your computer and your RPi to be on the same WiFi network. You’ll be logging into your device using its IP address. This method depends on finding the IP address of the RPi on the local network, which can sometimes prove challenging, primarily for users without a personal router, such as those using a university’s WiFi.
For Mac and Linux users, SSH doesn’t require any additional software downloads. For Windows users, PuTTY is the most common software used for SSH.
Required equipment
A headless setup requires the least amount of equipment, with no keyboard, mouse, or monitor required. Simply a way to power the board and an SD card for the operating system image.
- Power cable
- SD card 16GB+
- SD card reader (builtin to some computers already)
Getting Started with the Raspberry Pi
The Raspberry Pi uses an SD card as a hard-drive, storing all the files needed to run the operating system on it. Boards generally don’t include an SD card, so one will need to be purchased separately.
16GB is the minimum amount of space needed to run the software, but 32GB is the recommended size. Writing the software to the card will delete everything stored on the card, so make sure to back up any files previously stored there before getting started.
Software used for writing to the SD card
Formatting and writing to the SD card require software, and I recommend using Raspberry Pi’s own Imager software for this. Not only does it write all the files needed to the SD card, but it handles some critical configurations while doing so, making the setup phase much simpler.
Writing a new SD card image
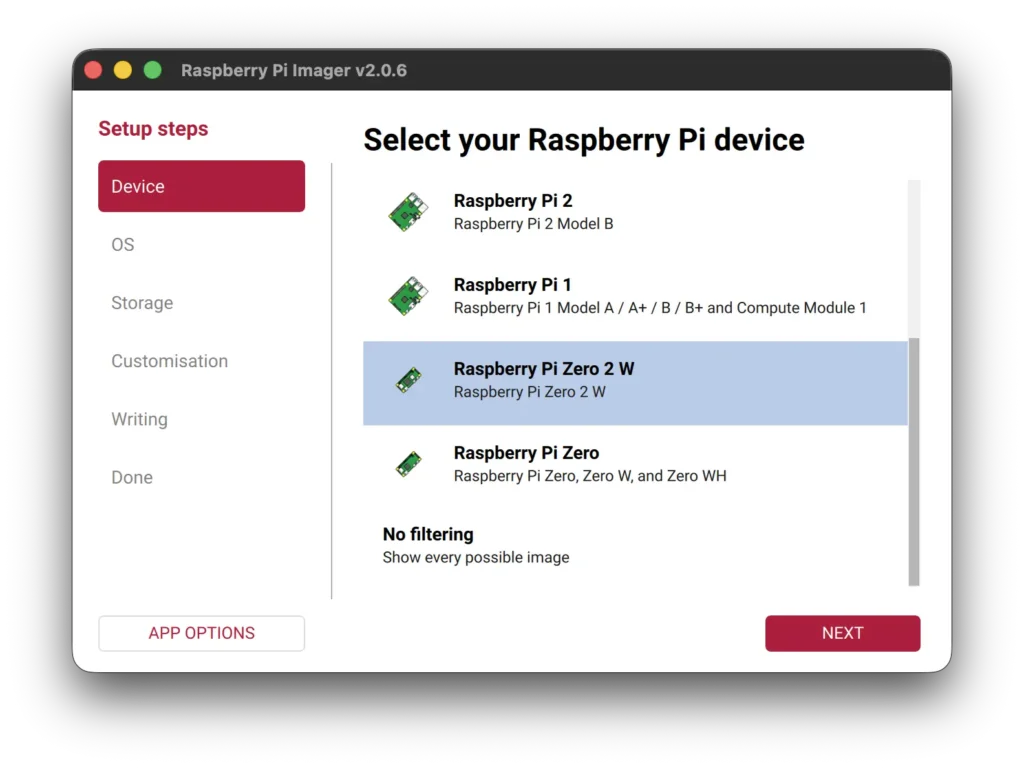
Select your Raspberry Pi device
Here I’m using the Raspberry Pi Zero 2 W, but there’s an option for all the models of Raspberry Pi.
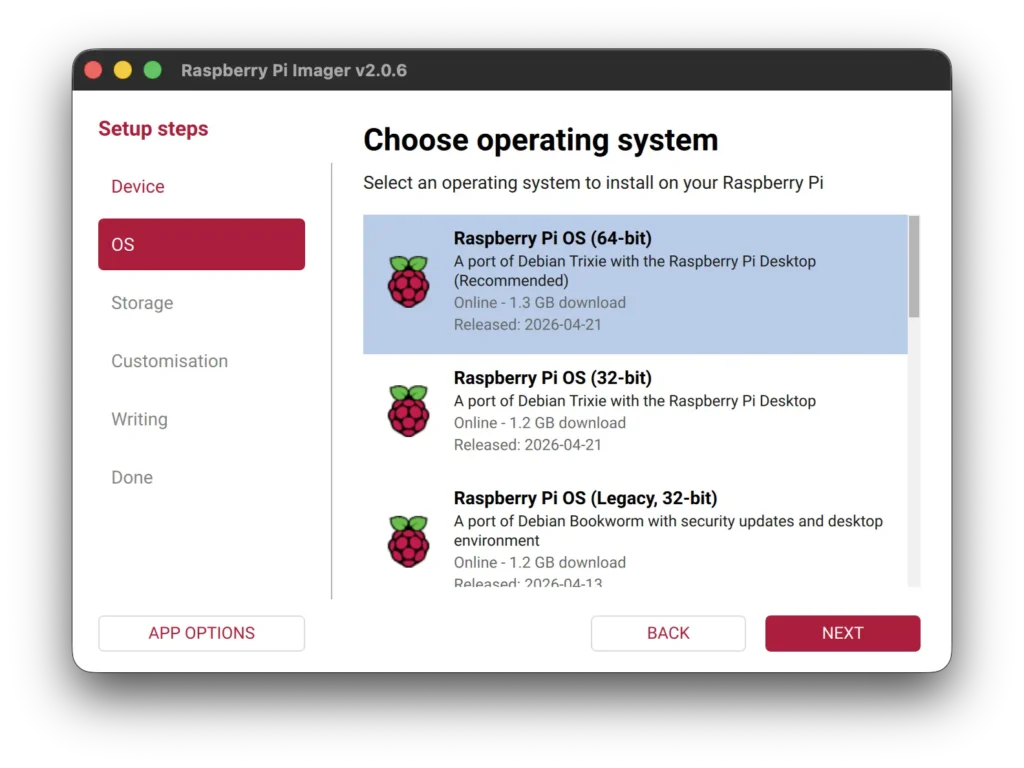
Choose operating system
I’m using the recommended option, Raspberry Pi OS (64-bit).
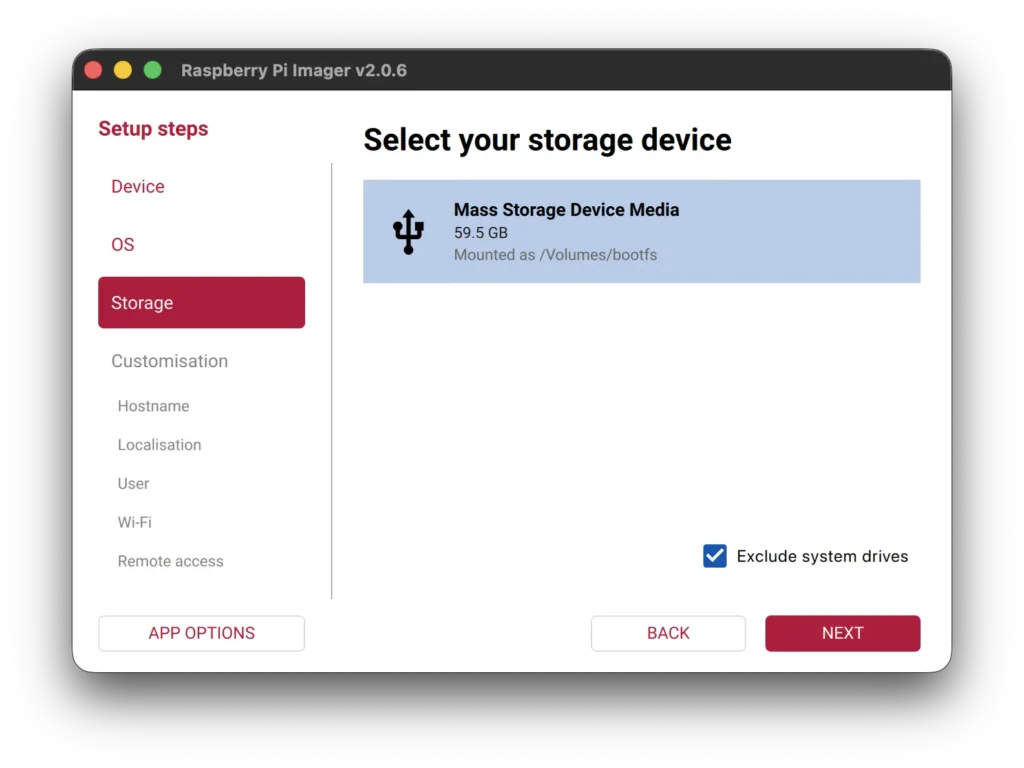
Select your storage device
Your SD card should appear here after connecting it to your computer.
When in doubt, unplug it, check the list of devices, then plug it back in and look for the newly added device.
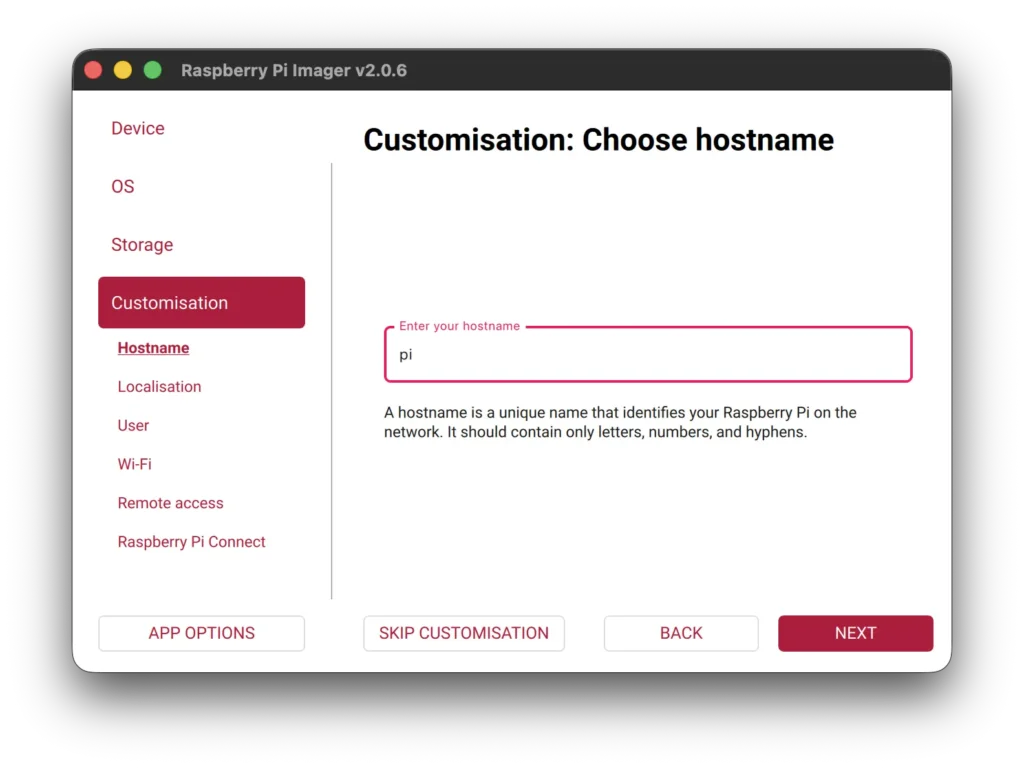
Customisation: Choose hostname
The default is “pi” but any unique hostname will work.
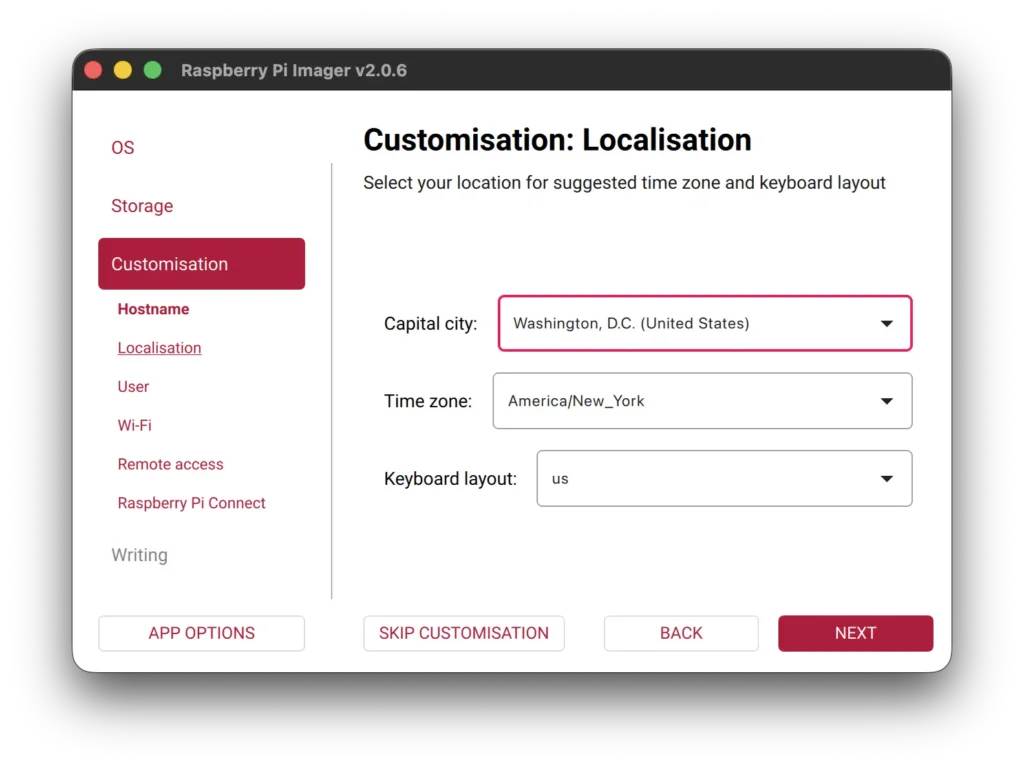
Customisation: Localisation
Select the appropriate timezone and keyboard layout.
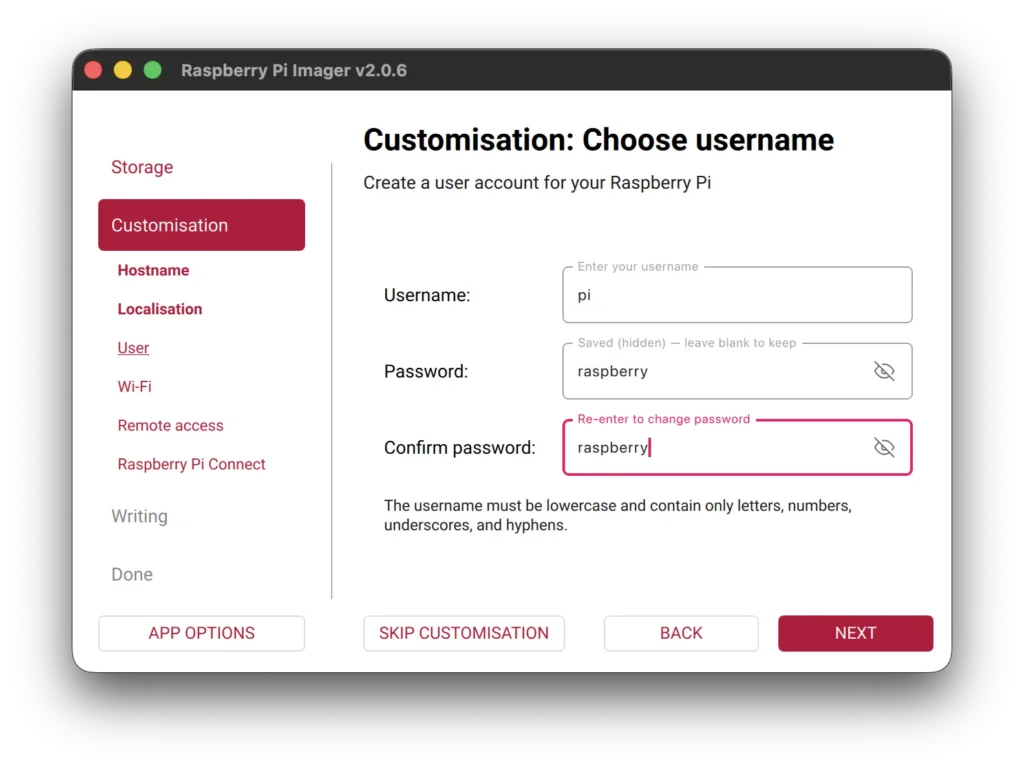
Customisation: Choose username
Select your username and password, used to login through SSH. The default name is “pi” and password is “raspberry”.
Make sure to write this down, you’ll have to start over with a new SD card image if you forget.
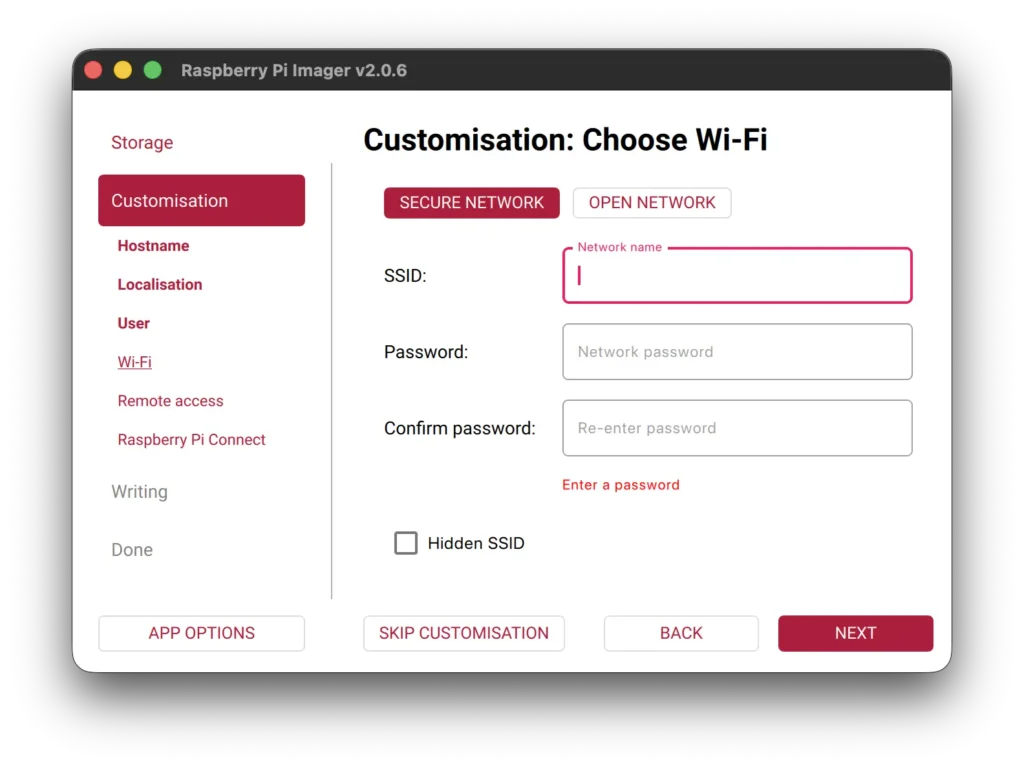
Customisation: Choose Wi-Fi
Enter the network name and password for you Wi-Fi network.
This must be the same network for the computer you will use to connect over SSH.
Customisation: SSH authentication
The most important step for this setup, enable SSH and choose password authentication.
You will be using the username and password setup above to login to your device through SSH.

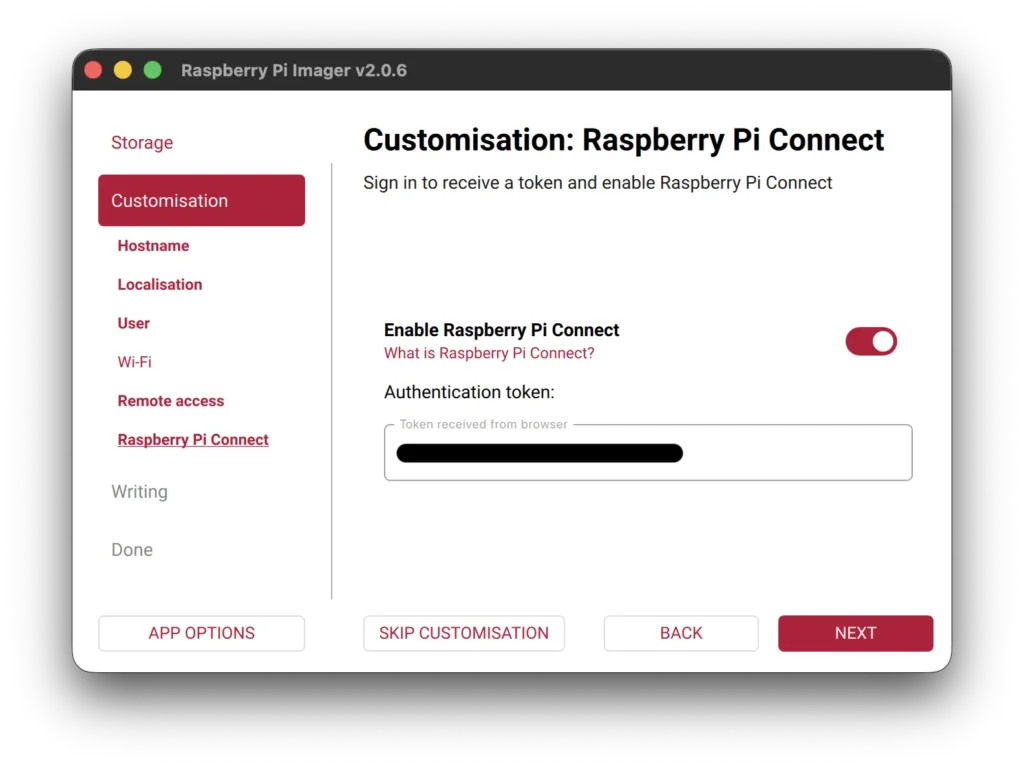
Optional: Raspberry Pi Connect
Optionally configure Raspberry Pi Connect to allow you to remotely access your Raspberry Pi through a graphical desktop interface.
Note: you must login to your device once before Raspberry Pi Connect is enabled.
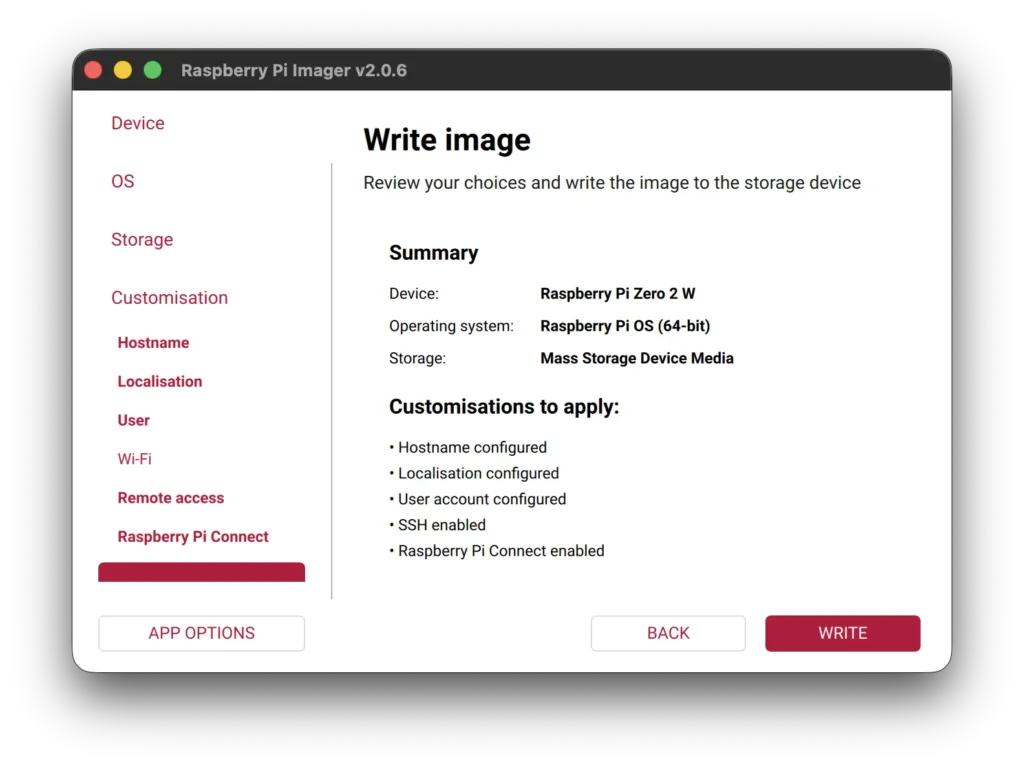
Finally: Write the image
Once everything is configured, write the image to the SD card.
This step can take over 15 minutes to write and verify the image, depending on the speed of your SD card and reader.
Find your Raspberry Pi’s IP address
To be able to connect to your device, you’ll first need to find it’s IP address on your local network. The address should start with 192.168. and have two additional numbers. In the images below, my address was 192.168.1.89, but it can vary every time.
Check your router’s connected devices
If you can login to your wireless router’s configuration panel, the simplest solution is to find the IP address listed there.
The Raspberry Pi will show up as the hostname specified when writing the SD card, under the list of all connected devices.
Use the terminal
If you’re comfortable using the terminal, there are several network commands to find the IP address.
arp
Use arp to find devices on your local network. Look for the hostname of your Raspberry Pi, set above.
arp -a
ping
Ping your device’s hostname at hostname.local.
ping pi.local
nmap
Run the nmap command on your local subnet (replace the .1. with the number that matches your computer’s local IP address), and look for your Raspberry Pi’s hostname.
sudo nmap -sn 192.168.1.0/24
Connect over SSH to your device
Once you’ve found the correct IP address of your Raspberry Pi, all that’s left is to connect over SSH.
The command to connect is ssh username@ip_address, using the username set during SD card writing and the IP address of the Raspberry Pi.
If you’re using Windows, you’ll use the username and IP address to connect through PuTTY, rather than the terminal.
ssh [email protected]You’ll then be prompted to enter the password for the username, also set during the SD card writing.
If you’re connecting for the first time, you may see a warning how the authenticity cannot be established. Type yes to continue connecting.
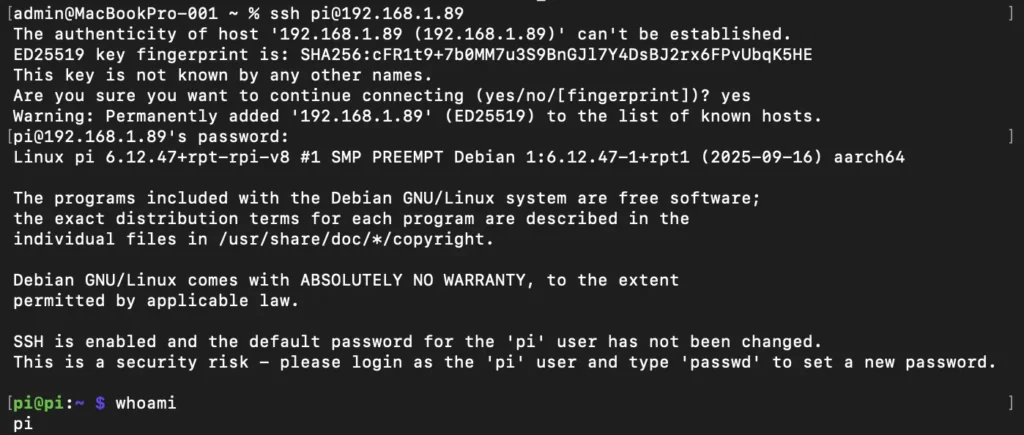
Once connected, try out a sample command or consider changing the password if you used the default option, like me.
Voilà
Now that you’ve successfully connected to your Raspberry Pi, you can begin on your first project, setup Raspberry Pi Connect, or just play around on your new computer.
Enjoy!
Leave a Reply